Blogs

10 Acne Myths vs Facts You Need to Know About
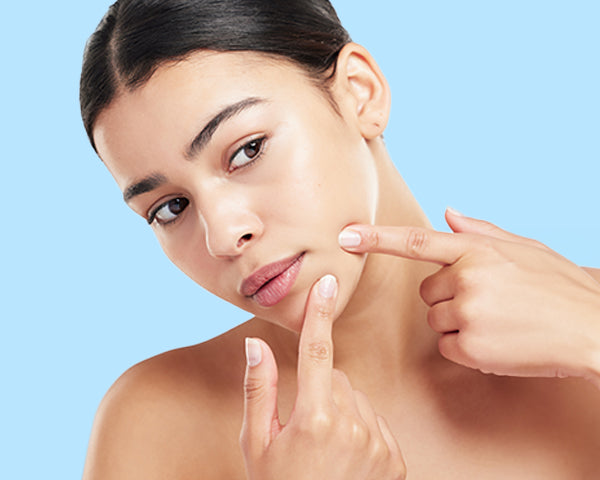
In This Blog Introduction Myth 1: Acne Only Affects Teenagers Myth 2: Acne Will Go Away on Its Own Myth 3: Junk Food, Chocolate, and Dairy Cause Acne Myth 4: Stress Causes Acne Myth 5: Acne Is Caused by Poor Hygiene Myth 6: Tanning Clears Up Acne Myth 7: Popping Pimples Helps Them Heal Faster Myth 8: Acne Is Just a Cosmetic Issue Myth 9: Natural Remedies Are Always Better Myth 10: Moisturizer Makes Acne Worse Final Thoughts Introduction - Clearing Up Acne Confusion Acne affects millions worldwide, yet myths about its causes and cures still dominate conversations, on social media, in friend groups, and even at beauty counters. From blaming chocolate to skipping moisturizer, these misconceptions can delay effective treatment and damage your confidence. Let’s bust 10 of the most common acne myths and uncover the facts that truly support healthy, clear skin. Myth 1: Acne Only Affects Teenagers Fact: Acne can appear at any age. Hormonal shifts during periods, pregnancy, menopause, or stress, often trigger breakouts in adults, especially women. Even “maskne” (mask-related acne) became common during the pandemic. Good to know: 40% of adult women experience acne well into their 30s and 40s. Myth 2: Acne Will Go Away on Its Own Fact: While some mild cases improve over time, many do not. Leaving acne untreated can lead to scarring and long-term skin issues. Effective treatments, from OTC salicylic acid to prescription retinoids, can make a major difference. Good to know: Early treatment reduces the risk of permanent damage and discoloration. Myth 3: Junk Food, Chocolate, and Dairy Cause Acne Fact: No single food directly causes acne. However, high-glycemic diets (think sugary snacks, white bread) and some dairy products may contribute to breakouts for some individuals. Good to know: Track your breakouts with a food journal to spot patterns. Everyone’s skin reacts differently. Myth 4: Stress Causes Acne Fact: Stress doesn’t directly cause acne, but it does worsen it. That’s because stress hormones like cortisol increase oil production and inflammation. Good to know: Stress management through sleep, exercise, and mindfulness can benefit your skin (and mind!). Myth 5: Acne Is Caused by Poor Hygiene Fact: Acne is not about being dirty. Over-washing or scrubbing too hard can actually irritate the skin and worsen breakouts. Good to know: Gently cleanse twice a day with a mild, non-stripping acne face wash. No more, no less. Myth 6: Tanning Clears Up Acne Fact: While tanning may temporarily dry out blemishes, UV exposure increases the risk of post-acne marks and even skin cancer. Good to know: Use a non-comedogenic SPF 50+ sunscreen daily, even on cloudy days. Myth 7: Popping Pimples Helps Them Heal Faster Fact: Squeezing can push bacteria deeper into the skin, increasing inflammation and the risk of scarring. Good to know: Spot treatments with ingredients like benzoyl peroxide or salicylic acid are safer and more effective long-term. Myth 8: Acne Is Just a Cosmetic Issue Fact: Acne can deeply affect mental health, leading to anxiety, low self-esteem, and even depression. It’s more than skin-deep, it deserves compassionate care. Good to know: Studies show visible skin issues significantly affect quality of life. You’re not alone in how you feel. Myth 9: Natural Remedies Are Always Better Fact: Natural doesn’t always mean safe. Lemon juice, toothpaste, or garlic can damage the skin barrier and cause burns or irritation. Good to know: Ingredients like tea tree oil or aloe vera may help, but only when used in properly formulated products. Myth 10: Moisturizer Makes Acne Worse Fact: Skipping moisturizer can backfire. Dry skin produces more oil, leading to clogged pores and irritation. Good to know: Look for lightweight, oil-free, non-comedogenic moisturizers. Hydrated skin heals faster and tolerates actives better. Final Thoughts: Start with Science, Stay Patient Misinformation makes acne harder to treat. Now that you know the truth, you can ditch the myths and build a routine that supports, not sabotages, your skin. Be kind to your skin. Stay consistent. Don’t hesitate to see a dermatologist when needed.
Learn more
Eczema Explained: Symptoms, Causes, Types & How to Treat It
In This Blog What is Eczema? Common Symptoms of Eczema What Causes Eczema? Types of Eczema Eczema Treatments Final Thoughts What Is Eczema? Eczema, or atopic dermatitis, is a chronic inflammatory skin condition that affects people of all ages. It causes dryness, redness, irritation, and intense itching, and while it’s not contagious, it can severely affect your quality of life. Eczema compromises your skin’s protective barrier, making it more vulnerable to irritants, allergens, and moisture loss. It often begins in childhood but can appear at any stage of life. Good to know: Eczema is part of the atopic triad, alongside asthma and hay fever, pointing to a shared immune and allergic link. Common Symptoms of Eczema Eczema symptoms vary by individual and severity, but common signs include: Persistent itching (often worse at night) Red, inflamed patches Dry or scaly skin Thickened or cracked areas Blisters or oozing during flare-ups Raw, sensitive skin from scratching In babies, it often appears on the cheeks and scalp. In adults, it may affect the neck, elbows, wrists, or knees. Good to know: Eczema tends to be cyclical, flare-ups may come and go depending on triggers. What Causes Eczema? There’s no single cause, eczema is the result of genetics, immune dysfunction, and environmental triggers. Common contributing factors include: A mutation in the filaggrin gene, which weakens the skin barrier Family history of eczema, asthma, or allergies Exposure to irritants: soaps, detergents, cigarette smoke Allergens: pollen, pet dander, dust mites Climate extremes: dry winters or humid summers Hormonal fluctuations (e.g., pregnancy, menstruation) Emotional stress Good to know: People with eczema often have an overreactive immune response, which triggers inflammation even from mild irritants. Types of Eczema Different eczema types may require slightly different care. Here’s a quick guide: Type What It Looks Like Triggers Atopic Dermatitis Most common form; dry, itchy rashes Genetic + immune-related Contact Dermatitis Red, itchy skin where irritant touched Soaps, metals, fragrances Dyshidrotic Eczema Small, itchy blisters on hands/feet Moisture imbalance, stress Nummular Eczema Coin-shaped red or brown patches Dry skin, insect bites Seborrheic Dermatitis Flaky, oily areas (scalp, eyebrows) Yeast imbalance Stasis Dermatitis Redness on lower legs Poor circulation, varicose veins Good to know: You can have more than one type of eczema at once. Eczema Treatments: What Really Works? While there’s no permanent cure, eczema is highly manageable with the right care. Here’s how: 1. Moisturizers (Barrier Repair) Use thick creams or ointments several times daily Apply immediately after bathing to lock in moisture Avoid fragranced products 2. Topical Medications Corticosteroids (short-term) to reduce inflammation Calcineurin inhibitors (e.g., tacrolimus) for sensitive areas or long-term use 3. Other Therapies Antihistamines to ease nighttime itch Antibiotics if the skin is infected Phototherapy (light therapy) for stubborn cases Biologics (like dupilumab) for moderate-to-severe eczema Good to know: Always patch test new products, even medicated ones. Lifestyle Tips for Flare-Up Prevention Daily habits make a huge difference: Use a humidifier in dry weather Wear breathable, cotton fabrics Shower with lukewarm, not hot, water Manage stress with breathing exercises, yoga, or journaling Identify and avoid known triggers (keep a symptom journal) Final Thoughts: Understanding Eczema Empowers You Eczema may be chronic, but it doesn’t have to control your life. By understanding its root causes and your personal triggers, and by using moisturizers, medications, and lifestyle changes, you can dramatically reduce flare-ups and reclaim comfort in your skin.
Learn more
How to Identify Your Skin Type (Oily, Dry, Sensitive & More)
In This Blog Why Knowing Your Skin Type Matters The 5 Main Skin Types How to Identify Your Skin Type at Home Quick Reference Table Final Thoughts Why Knowing Your Skin Type Matters Before choosing your cleanser, serum, or moisturizer, there’s one essential question you need to answer: What’s your skin type? Understanding how your skin behaves, how much oil it produces, how it reacts to the environment, and how it feels day-to-day lays the foundation for an effective skincare routine. This guide will help you figure out your true skin type and treat it with the care it deserves. What Is Skin Type? Your skin type refers to your skin’s natural tendencies, like oil production, hydration levels, and sensitivity. While your genetics play a role, factors such as climate, hormones, age, and diet can influence how your skin behaves. Your skin type may even change with seasons or life stages. Dermatologists generally classify skin into five types: Oily Dry Combination Sensitive Normal Let’s explore how to identify each one, and how to support it. The 5 Main Skin Types (And How to Care for Them) 1. Oily Skin: Shine Today, Fewer Wrinkles Tomorrow? Signs: Visible shine, especially in the T-zone Enlarged pores Frequent blackheads or breakouts Makeup tends to slip off midday Why it happens:Excess sebum production, often influenced by genetics or hormones, can lead to clogged pores and acne. The silver lining? Oily skin tends to age more slowly. Care Tips: Use oil-free, non-comedogenic products Gel-based moisturizers work best Cleanse twice daily with foaming or salicylic acid (AHA) formulas Good to know: Don’t skip moisturizer—hydration still matters, even for oily skin. 2. Dry Skin: Dullness, Flakes, and a Thirst for Moisture Signs: Flaky or rough patches Tight feeling after washing Fine lines appear more pronounced Dull or uneven tone Why it happens:Low oil production and a weakened barrier can leave skin dehydrated, especially in cold or dry environments. Care Tips: Avoid harsh or foaming cleansers Look for moisturizers with ceramides, hyaluronic acid, or glycerin Apply moisturizer immediately after cleansing Good to know: Overnight creams or sleeping masks can boost hydration levels. 3. Combination Skin: The Balancing Act Signs: Oily T-zone with dry or normal cheeks Pores appear larger in some areas Makeup fades unevenly Why it happens:Combination skin is influenced by both oil imbalance and environmental triggers. The T-zone tends to overproduce oil, while the rest of the face may feel dry or sensitive. Care Tips: Use different products for different zones (e.g., gel for T-zone, cream for cheeks) Spot treat with targeted serums or masks Avoid over-cleansing or over-exfoliating Good to know: Seasonal changes often exaggerate the contrast—adjust your routine accordingly. 4. Normal Skin: Balanced & Low-Maintenance Signs: Even tone and smooth texture Small pores Rare breakouts or dryness Comfortable, balanced feel Why it happens:Normal skin has well-regulated oil and moisture levels. Though low-maintenance, it still needs care to stay balanced. Care Tips: Stick to gentle cleanser and lightweight moisturizer Don’t skip SPF, UV damage affects all skin types Incorporate antioxidant serums for preventive care Good to know: Even “normal” skin can shift due to stress, hormones, or travel. 5. Sensitive Skin: Easily Irritated, Always Reactive Signs: Redness, stinging, or burning Reacts to fragrance or active ingredients Breakouts or flare-ups triggered by stress, weather, or diet Why it happens:A compromised skin barrier or heightened nerve response can make skin more reactive to ingredients or changes. Care Tips: Choose fragrance-free, hypoallergenic products Patch test all new skincare Consider calming ingredients like centella asiatica or oat extract Good to know: Sensitive skin often overlaps with other types (e.g., dry-sensitive or oily-sensitive). How to Identify Your Skin Type at Home 1. Visual Check (After Cleansing) Wash your face with a gentle cleanser and wait 2 hours, no products. Look in natural light and assess: Skin Type What You’ll See Oily Shine, especially in T-zone; enlarged pores Dry Dullness, flakiness, or tightness Combination Shine in T-zone, dryness on cheeks Sensitive Redness or irritation, especially near cheeks or nose Normal Smooth, even skin without visible dryness or oiliness 2. Blotting Sheet Test Press blotting paper on forehead, nose, cheeks, and chin two hours after washing. Oil Pattern Skin Type Paper soaked with oil in all zones Oily Oil mostly in T-zone Combination Barely any oil Dry Light, even oil across all zones Normal Patchy redness with little oil Sensitive Good to know: Combine both methods for a more accurate read—especially if you’re between types. Quick Reference Table Skin Type Key Signs Best Ingredients Avoid Oily Shine, clogged pores Niacinamide, salicylic acid Thick oils, heavy creams Dry Flaky, tight skin Hyaluronic acid, ceramides Foaming cleansers Combination Oily T-zone, dry cheeks Gel cream + cream combo Over-cleansing Sensitive Redness, reactions Allantoin, fragrance-free or IFRA Certified fragrance Alcohol, essential oils Normal Balanced feel Antioxidants, SPF Harsh exfoliants Final Thoughts: Know It, Treat It, Glow From It Your skincare journey starts with understanding your skin. The more in tune you are with how your skin behaves, the easier it is to find the right products and avoid wasting money on the wrong ones. Skin isn’t static, it evolves with your lifestyle, stress, hormones, and climate. Learn it, respect it, and treat it with kindness.
Learn more
The 3-Step Night Skincare Routine That Actually Works While You Sleep
In This Blog While You Sleep, Your Skin Goes to Work Cleanse: Wash the Day Away Treat: Target Your Skin’s Needs Moisturize: Seal and Support Personalize Your Routine, Gently Final Thoughts: Simple Steps, Real Results While You Sleep, Your Skin Goes to Work Your skin does its deepest healing and repair at night, renewing cells, reversing daytime damage, and absorbing ingredients more effectively. That’s why your nighttime skincare routine isn’t just about relaxation, it’s a prime opportunity to support your skin’s recovery cycle. The good news? You don’t need 6+ steps to make an impact. A well-structured 3-step routine is more than enough to promote smoother, brighter, healthier skin by morning. Your 3 Essential Night Skincare Steps 1. Cleanse: Wash the Day Away Why it matters: Your skin collects sunscreen, makeup, pollution, oil, and sweat throughout the day. Cleansing removes this build-up and helps prevent clogged pores, breakouts, and dullness. How to use: Massage your chosen cleanser onto dry or damp skin for 30–60 seconds. Rinse with lukewarm water and gently pat dry. Optional Boost: Use an oil cleanser for makeup removal or double cleanse (oil + gel) if you wear SPF or live in a polluted area. 2. Treat: Target Your Skin’s Needs Why it matters: Nighttime is when your skin is most receptive to active ingredients. Treatments like serums, exfoliants, or retinoids work better while you sleep. How to use: Apply treatments after cleansing and allow each to absorb before layering the next. Use thin-to-thick texture as your layering guide. Good to Know: You don’t need every treatment every night. Alternate based on skin needs (e.g., retinol one night, hydration the next). Examples of Night Treatments: For dryness: Hyaluronic acid or barrier-repair serums For oil control: Niacinamide or BHAs For aging: Retinoids or peptides For dark spots: Azelaic acid or gentle exfoliants Optional Boost: Use a chemical exfoliant (like AHA/BHA) 2–3 times a week to promote cell turnover — but not on retinoid nights. 3. Moisturize: Seal and Support Overnight Repair Why it matters: Moisturizing is the final (and non-negotiable) step. It locks in hydration, prevents water loss, and supports barrier repair, all essential functions during sleep. How to use: Apply a generous layer of moisturizer to your face and neck using upward strokes. Use clean hands and allow it to fully absorb. Optional Boost: Layer a face oil or sleeping mask if skin feels tight or dry — for deeper overnight replenishment. Looking for a hydration hero? Try Moiz LMF 48 Face & Body Lotion, powered by Hyaluronic Acid, Aquaxyl™, and Macadamia Oil. It delivers hydration and barrier support for up to 48 hours. Personalize Your Routine, Gently Once your 3-step foundation is in place, you can customize your routine with smart, targeted add-ons: Exfoliate 2–3 nights a week to boost glow and texture Use eye cream if you have dark circles or puffiness Apply spot treatments only where needed Just remember, more isn’t always better. Layer based on your skin’s needs, not product hype. Introduce new actives slowly, and give your skin time to adjust. Final Thoughts: Simple Steps, Real Results Your skin doesn’t need a complicated ritual, it needs consistency and care. At night, focus on three essential actions: Cleanse. Treat. Seal. Stick to this foundation, build thoughtfully if needed, and let your skin do what it does best: renew, restore, and reveal your glow.
Learn more
The Only 3 Skincare Steps You Actually Need in the Morning
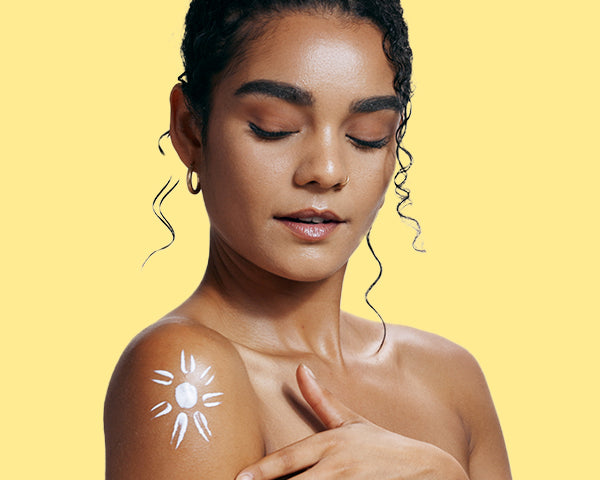
In This Blog Your 3-Step Morning Skincare Routine Cleanser: Start Fresh Moisturizer: Lock in Hydration Sunscreen: Protect Like It’s Your Job Want to Do a Bit More? Final Thoughts: Great Skin Starts with Less When it comes to caring for your skin, less can truly be more. You don’t need a 10-step regimen to achieve healthy, glowing skin. In fact, most dermatologists agree that a consistent, simplified morning routine built around three core steps is all your skin really needs to thrive. Whether you’re a skincare minimalist or just want to streamline your routine, this guide walks you through the only three products you need every morning, plus a few smart extras, if you’re feeling fancy. Your 3-Step Morning Skincare Routine 1. Cleanser: Start Fresh Overnight, your skin accumulates oil, sweat, and dead skin cells. Cleansing helps clear the slate so the rest of your routine works better. Massage a gentle cleanser onto damp skin for 30–60 seconds, then rinse with lukewarm water and pat dry. Optional Boost Choose a gel cleanser if you’re oily, a hydrating cream cleanser if you’re dry, or a foam-based option if you’re acne-prone. Moiz Cleansing Lotion Gentle, soap-free cleanser for face & body. Ideal for dry to sensitive skin. Shop Now 2. Moisturizer: Lock in Hydration Moisturizing keeps your skin barrier healthy, prevents dehydration, and gives your skin a smooth, supple feel. After cleansing, apply a thin layer evenly across your face and neck. Look for ingredients like hyaluronic acid, ceramides, or squalane based on your skin’s needs. Smart Tip Choose an eye-safe moisturizer to skip the need for a separate eye cream, unless you’re targeting specific concerns like puffiness or dark circles. Moiz LMF 48 Lotion Deep, long-lasting hydration for dry to very dry skin. Up to 48 hours of moisture. Shop Now 3. Sunscreen: Protect Like It’s Your Job Sunscreen is your skin’s best defense against sunburn, premature aging, pigmentation, and skin cancer. Apply a broad-spectrum sunscreen with SPF 30 or higher as the final step in your routine, yes, even if it’s cloudy. Pro Tip If your moisturizer doesn’t contain SPF, sunscreen should always follow. Never skip it, your future skin will thank you. UVCross Sunscreen Gel SPF 50 Broad-spectrum UVA/UVB protection. Lightweight, matte finish, no white cast. Shop Now Want to Do a Bit More? You absolutely can, but only if you want to. Once your 3-step core is on lock, you can gently introduce: A hydrating toner if your skin feels tight post-cleanse A vitamin C serum to brighten and boost protection against pollution A spot treatment for occasional blemishes A face oil for dry patches or winter weather Final Thoughts: Great Skin Starts with Less Skincare doesn’t have to be overwhelming. In fact, some of the most effective routines are the simplest ones. With just a cleanser, moisturizer, and sunscreen, you’re covering the most important bases: cleansing, hydrating, and protecting. Once you master those, you can layer in more based on your skin’s goals, not trends.
Learn more
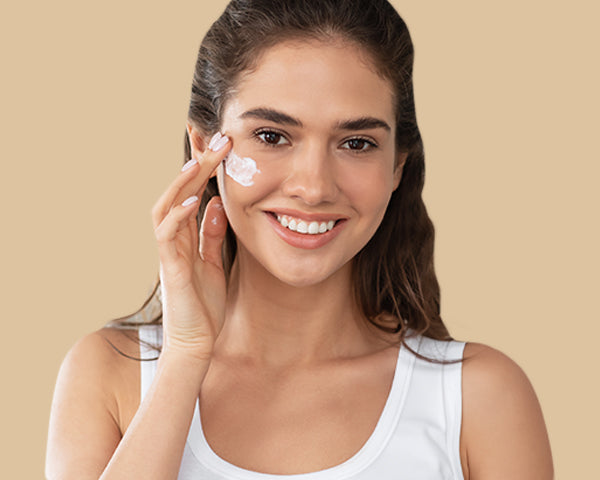
Are You Using the Right Moisturizer? Here’s How to Find Your Perfect Match
In This Blog What Is a Moisturizer? What Happens When You Moisturize Daily? How to Apply Moisturizer (Step-by-Step) How to Choose the Right Moisturizer for Your Skin Different Types of Moisturizers (Textures Explained) Final Takeaway: Moisturizer Is Non-Negotiable Your skin is the body’s largest organ, and it deserves to be treated like royalty. Whether you’re just starting your skincare journey or refining your existing routine, there’s one product that can make or break your glow: your moisturizer. This guide will help you understand what a moisturizer does, when to use it, how to use it correctly, and how to choose one that actually suits your skin type. Because once you nail this step, your entire skincare routine becomes more effective. What Is a Moisturizer? A moisturizer is a topical skincare product that hydrates the skin and strengthens its natural barrier. It’s designed to retain water in the outermost layer of the skin (stratum corneum) and protect against environmental aggressors like pollution and extreme weather. Key Components of Most Moisturizers: Humectants (e.g., glycerin, hyaluronic acid): Draw moisture from the air and deeper skin layers to hydrate the surface. Emollients (e.g., squalane, shea butter, fatty acids): Smooth skin by filling in micro-cracks between skin cells. Occlusives (e.g., petrolatum, dimethicone, lanolin): Form a protective barrier to seal in hydration and prevent water loss. What Happens When You Moisturize Daily? Hydration Maintenance: Prevents transepidermal water loss (TEWL), keeping skin supple. Barrier Repair: Strengthens the skin’s lipid layer to fight external stressors. Anti-Aging Benefits: Well-moisturized skin has fewer visible fine lines and better elasticity. Reduces Irritation: Helps calm skin that’s sensitive or inflamed. Improves Texture: Smooth skin helps makeup apply better and enhances your natural glow. Did you know? Even oily skin types need hydration, skipping moisturizer can actually trigger more oil production. How to Apply Moisturizer (Step-by-Step) Start with a Clean Face: Use a gentle cleanser suitable for your skin type. Apply to Damp Skin: For maximum absorption, apply your moisturizer within 60 seconds of washing. Use the Right Amount: A pea-sized amount usually covers the face. Use more for neck and chest. Gently Pat In: Avoid rubbing, use upward, outward strokes to distribute the product. Layer Properly: Apply after serums but before sunscreen (in the morning). How Often? Morning and night, every single day—even if your skin feels oily or “normal.” How to Choose the Right Moisturizer for Your Skin Skin Type Look For Dry or Dehydrated Creams with ceramides, shea butter, hyaluronic acid, and squalane. Oily / Acne-Prone Lightweight gels or lotions with niacinamide, zinc, or panthenol. Must be non-comedogenic. Sensitive Products with soothing agents like aloe vera, colloidal oatmeal, or allantoin. Combination Gel-cream hybrids or use different products for oily (T-zone) and dry (cheeks) areas. Mature / Aging Moisturizers with peptides, antioxidants (vitamin C, E), and retinoid-compatible ingredients. Different Types of Moisturizers (Textures Explained) Creams: Thick, rich, ideal for dry or mature skin, especially in colder months. Lotions: Lighter than creams, good for normal or slightly dry skin. Gels: Water-based, fast-absorbing, perfect for oily, acne-prone, or humid climates. Ointments: Thickest and most occlusive, ideal for severely dry or compromised skin (e.g., eczema-prone). Balms: Often oil-based and concentrated, best for targeted areas or night repair. Pro Tip: Your moisturizer may change with the season, gel in summer, cream in winter is a common switch. Final Takeaway: Moisturizer Is Non-Negotiable Still unsure if you’ve picked the right moisturizer? Here’s your checklist: Does your skin feel dry, oily, or sensitive despite moisturizing? Do you often break out or experience tightness or flaking? Does your moisturizer sit on your skin instead of sinking in? If you answered “yes” to any of the above, it’s time for a switch.
Learn more